





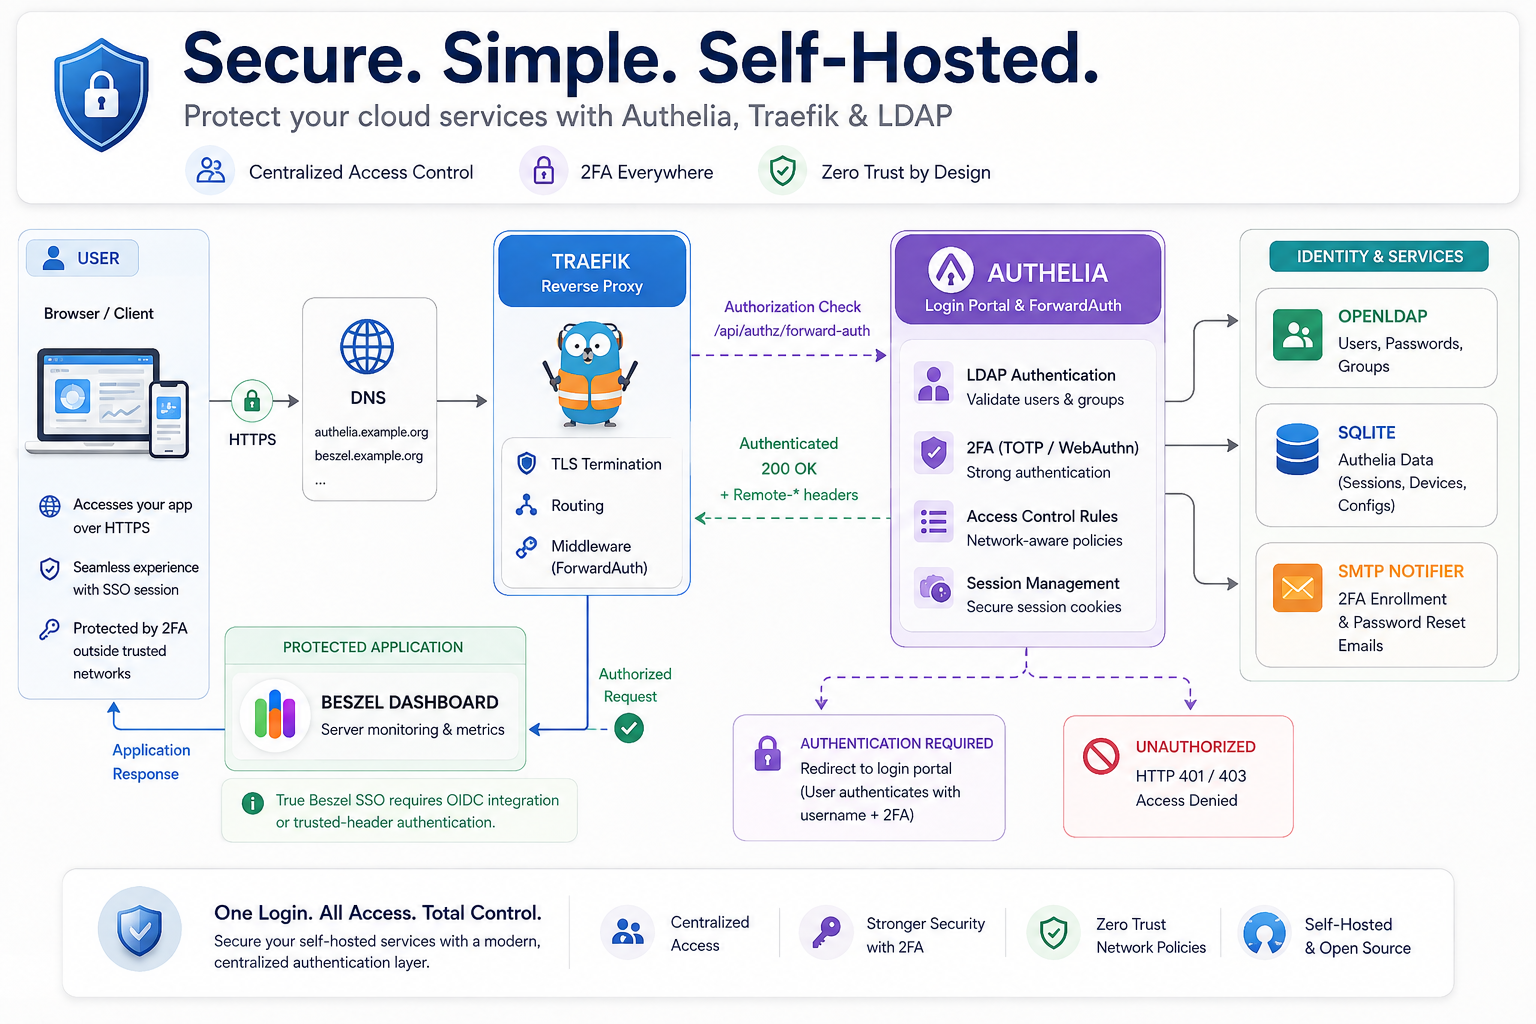
I like running a few services either on my private homelab or on various cloud VPS. I prefer self-hosted applications and my security/privacy setup is to have a different username/email with a different password for each one of them. With password managers like vaultwarden/Bitwarden this is easier. What I would like to do next is to restrict access and protect my cloud applications behind a single login page and add 2FA to them. That’s what Authelia does.
In this article I will walk you through on how to setup authelia, and to make it concrete, we will protect Beszel, which is a lightweight server-monitoring dashboard that tracks CPU, RAM, disk, and network usage of your machines. It’s a great first useful, simple, and easy to tell at a glance whether the login wall is working.
Prerequisites
- Authelia — the login page that decides who gets in
- Authelia MUST be served via the https scheme. This is not optional even for testing!
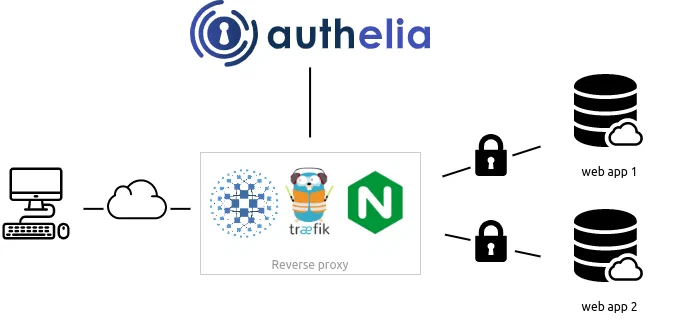
- Authelia is a companion of reverse proxies like Traefik (good news)
- Traefik — your existing reverse proxy, which it will tell to ask Authelia’s permission before letting anyone through your application
- Your existing LDAP server — the directory of usernames and passwords Authelia will check against
- I user openldap already, so it’s useful to use an existing database.
- Beszel — the example app we’ll put behind the login page
- a new DNS name for authelia, like
authelia.example.org
Authelia Architecture
Directory layout
Here is the folder layout (under traefik directory):
./authelia/
├── authelia.env
├── docker-compose.yaml
├── config/
│   └── configuration.yml
└── secrets/
    ├── JWT_SECRET
    ├── LDAP_PASSWORD
    ├── SESSION_SECRET
    └── STORAGE_ENCRYPTION_KEY
Step 1 — Create the folders
Authelia needs two folders: one for its configuration file, and one for its secret keys. Actually the secret directory is a choice for storing the authelia secrets that we will create at the next step.
mkdir -p ./authelia/config
mkdir -p ./authelia/secrets
Step 2 — Generate the secret keys
Authelia relies on a few long, random strings to keep things secure: one to sign password-reset links, one to encrypt your login session, and one to encrypt its small local database. Rather than pasting these into a config file in plain sight, we’ll save each one into its own private file.
copy/paste the below commands in your terminal to generate all secrets:
openssl rand -hex 32 | tr -d 'n' > ./authelia/secrets/JWT_SECRET
openssl rand -hex 32 | tr -d 'n' > ./authelia/secrets/SESSION_SECRET
openssl rand -hex 32 | tr -d 'n' > ./authelia/secrets/STORAGE_ENCRYPTION_KEY
Now add your LDAP bind password:
echo -n "YOUR_LDAP_BIND_PASSWORD" > ./authelia/secrets/LDAP_PASSWORDFinally, update permissions to these files so only your user can read them:
chmod 600 ./authelia/secrets/*What each file is for:
| File | Purpose |
|---|---|
JWT_SECRET |
Signs password-reset links so they can’t be forged |
SESSION_SECRET |
Encrypts your login session cookie |
STORAGE_ENCRYPTION_KEY |
Encrypts Authelia’s local database (registered devices, sessions) |
LDAP_PASSWORD |
The password Authelia uses to log into your LDAP server and search it |
Do not commit this
secretsfolder to git, and never share these files, to avoid anyone to impersonate your authelia.
Step 3 — Authelia configuration file
Create a new configuration file at ./authelia/config/configuration.yml.
Replacing the <...> placeholders with your own details and domain.
I use example.com for the ldap server and example.org for application domain. Which means I have multiple domains on the LDAP.
---
identity_validation:
  reset_password:

definitions:
  network:
    internal:
      - '10.10.0.0/16'
      - '172.16.0.0/12'
      - '192.168.2.0/24'
      - '100.64.0.0/10'  # tailscale network
    my_static:
      - '<my_static_ip>/32'

authentication_backend:
  ldap:
    address: 'ldaps://<ldap_ip>:636'
    implementation: 'custom'
    tls:
      server_name: 'openldap.example.com'
    base_dn: 'dc=example,dc=com'
    additional_users_dn: 'ou=People'
    # login with either username or email address
    users_filter: '(&(|({username_attribute}={input})({mail_attribute}={input}))(objectClass=person))'
    additional_groups_dn: 'ou=Groups'
    groups_filter: '(&(member={dn})(objectClass=groupOfNames))'
    user: 'cn=admin,dc=example,dc=com'
    attributes:
      username: 'uid'
      display_name: 'cn'
      mail: 'mail'

access_control:
  default_policy: 'deny'

  rules:
    - domain: 'blog.example.org' # allow blog to everybody
      policy: 'bypass'

    - domain: 'beszel.example.org' # bypass beszel for my networks
      policy: 'bypass'
      networks:
        - 'internal'
        - 'my_static'

    - domain: 'beszel.example.org' # username/password to access beszel for all other networks.
      #policy: 'one_factor'
      policy: 'two_factor'

# session cookies to authorize user access to various protected websites
session:
  name: 'authelia_session'
  cookies:
    - domain: 'example.org'
      authelia_url: 'https://authelia.example.org'
      default_redirection_url: 'https://beszel.example.org'

# storage options: sqlite, mysql & postgres
storage:
  local:
    path: '/config/db.sqlite3'

# switch to SMTP in production
notifier:
  filesystem:
    filename: '/config/notification.txt'
...
Validate authelia configuration
if you need to verify authelia configuration at any point, use:
docker compose run --rm authelia authelia config validate --config /config/configuration.yml
a typical resul should be:
# docker compose run --rm authelia
  authelia config validate --config /config/configuration.yml

Container traefik-authelia-run-ef4ec807d5b6 Creating
Container traefik-authelia-run-ef4ec807d5b6 Created
Configuration parsed and loaded successfully without errors.
Step 4 — Create the Beszel user in LDAP
the LDAP directory is the source of truth for who gets in, so we need at least one user to log in with. On your LDAP server, generate a hashed password for that user. The main idea is that the the ldap user and the beszel user have the same credentials to autologin. Eitherwise you just need to login twice :)
slappasswd -h {SSHA} -s "YOUR_BESZEL_PASSWORD"Copy the output — it should look like {SSHA}abc123... — and create a file called beszel.ldif with this content (adjust uid, cn, mail to fit your setup):
dn: uid=beszel,ou=People,dc=example,dc=com
objectClass: inetOrgPerson
objectClass: organizationalPerson
objectClass: person
objectClass: posixAccount
objectClass: top
cn: Beszel User
givenName: Beszel
homeDirectory: /home/beszel
mail: beszel@example.org
sn: User
uid: beszel
uidNumber: 1001
gidNumber: 1001
userPassword: {SSHA}<hashed_password>
Now add it to your directory. Run this on your LDAP server (or from any machine that can reach it and has the ldap-utils tools installed):
ldapadd -x -D "cn=admin,dc=example,dc=com" -W -f beszel.ldifYou’ll be prompted for the LDAP admin password, then the user is created. That’s the account you’ll type into Authelia’s login page in Step 8.
the above ldap diff is an example, adapt it accordinly to your needs and setup.
Step 5 — Add Authelia to your docker-compose.yml
Create ./authelia/docker-compose.yaml with this content:
---
services:
  authelia:
    image: authelia/authelia:4.39.20
    container_name: authelia
    restart: unless-stopped
    volumes:
      - ./config:/config
    healthcheck:
      disable: false
    secrets:
      - AUTHELIA_JWT_SECRET
      - AUTHELIA_LDAP_PASSWORD
      - AUTHELIA_SESSION_SECRET
      - AUTHELIA_STORAGE_ENCRYPTION_KEY
    env_file:
      - ./authelia.env

secrets:
  AUTHELIA_JWT_SECRET:
    file: ./secrets/JWT_SECRET
  AUTHELIA_LDAP_PASSWORD:
    file: ./secrets/LDAP_PASSWORD
  AUTHELIA_SESSION_SECRET:
    file: ./secrets/SESSION_SECRET
  AUTHELIA_STORAGE_ENCRYPTION_KEY:
    file: ./secrets/STORAGE_ENCRYPTION_KEY
Then create ./authelia/authelia.env (change the timezone to yours). Change the log level to debug if also needed:
AUTHELIA_LOG_LEVEL=info

TZ=Europe/Athens

AUTHELIA_AUTHENTICATION_BACKEND_LDAP_PASSWORD_FILE=/run/secrets/AUTHELIA_LDAP_PASSWORD
AUTHELIA_SESSION_SECRET_FILE=/run/secrets/AUTHELIA_SESSION_SECRET
AUTHELIA_STORAGE_ENCRYPTION_KEY_FILE=/run/secrets/AUTHELIA_STORAGE_ENCRYPTION_KEY
AUTHELIA_IDENTITY_VALIDATION_RESET_PASSWORD_JWT_SECRET_FILE=/run/secrets/AUTHELIA_JWT_SECRET
A few things worth knowing about this block:
- No
ports:line. There is no need to expose Authelia directly to the internet — Traefik will talk to it privately, container-to-container, over the shared network. - No custom healthcheck needed. The Authelia image already includes one built in — Docker will automatically mark the container “healthy” or “unhealthy” without you configuring anything.
- The
secrets:block mounts each secret file into the container at/run/secrets/..., read-only. Theenv_filelines then just tell Authelia where to find each one. This keeps the actual secret values out ofdocker inspectoutput, unlike writing them straight as environment variables.
hey! do not forgot to update traefik docker-compose.yaml to include authelia docker compose yaml
include:
  # authelia.example.org: authentication and authorization server and portal
  - path: ./authelia/docker-compose.yaml
Step 6 — Tell Traefik about Authelia
I am using YAML dynamic configuration with Traefik and not labels, for me it’s more clear that way. I keep everyting under etc_traefik/dynamic/
First, we add the middleware aka the reusable “ask Authelia before letting this request through” rule. Create middlewares.yml if you have not yet a middleware yaml file.
http:
  middlewares:

    authelia:
      forwardAuth:
        # address: "http://authelia:9091/api/verify?rd=https://authelia.example.org/"
        address: "http://authelia:9091/api/authz/forward-auth"
        trustForwardHeader: true
        maxResponseBodySize: 8192
        authResponseHeaders:
          - Remote-User
          - Remote-Groups
          - Remote-Name
          - Remote-Email
Then, we create the router — so the login page itself is reachable at https://authelia.example.org and also auto create the TLS certifcate with letsencrypt.
authelia.yml:
http:
  routers:
    authelia:
      rule: 'Host(`authelia.example.org`)'
      entryPoints: ["websecure"]
      service: "authelia"
      tls:
        certResolver: letsencrypt

    authelia-http:
      rule: 'Host(`authelia.example.org`)'
      entryPoints:
        - web
      service: "authelia"
      middlewares:
        - redirect-to-https

  services:
    authelia:
      loadBalancer:
        servers:
          - url: "http://authelia:9091"
Notes:
certResolver: letsencrypt— use whatever you named your certificate resolver in Traefik’s main config (the one that gets you your Let’s Encrypt certificates). If yours has a different name, change it here.authelia-httpjust catches plainhttp://requests and redirects them tohttps://— this assumes you already have aredirect-to-httpsmiddleware defined in your Traefik dynamic config, which is a standard pattern.- Make sure both
authelia.example.organdbeszel.example.orgalready have DNS records (anArecord) pointing at your server, same as your other subdomains.
Step 7 — Put Beszel behind the login page
Now for the authelia part to beszel. Update beszel.yml in the same Traefik dynamic config folder. If Beszel already has a router file, it should look this:
http:
  routers:
    beszel:
      rule: 'Host(`beszel.example.org`)'
      entryPoints: ["websecure"]
      service: "beszel"
      tls:
        certResolver: letsencrypt
      middlewares:
        - authelia@file     # <-- this line is the only change

    beszel-http:
      rule: 'Host(`beszel.example.org`)'
      entryPoints:
        - web
      service: "beszel"
      middlewares:
        - redirect-to-https

  services:
    beszel:
      loadBalancer:
        servers:
          - url: "http://beszel:8090"
The whole magic is: - authelia@file in the middleware list. (The @file suffix just tells Traefik the middleware is defined in a dynamic file.
Any router you add that line to is now protected: visitors get redirected to the Authelia login page first.
TRUSTED_AUTH_HEADER
Do not forget to add TRUSTED_AUTH_HEADER to your beszel docker compose yaml file, to allow autologin!
beszel-docker-compose.yml
environment:
  USER_CREATION: false
  TRUSTED_AUTH_HEADER: "Remote-Email"
With this, it will
Step 8 — Start authelia.
From the ./authelia folder:
docker compose up -d authelia
docker compose logs -f authelia
Traefik is already watching its dynamic config folder, so it will pick up the new files automatically — no restart needed.
Monitor docker compose logs in the console.
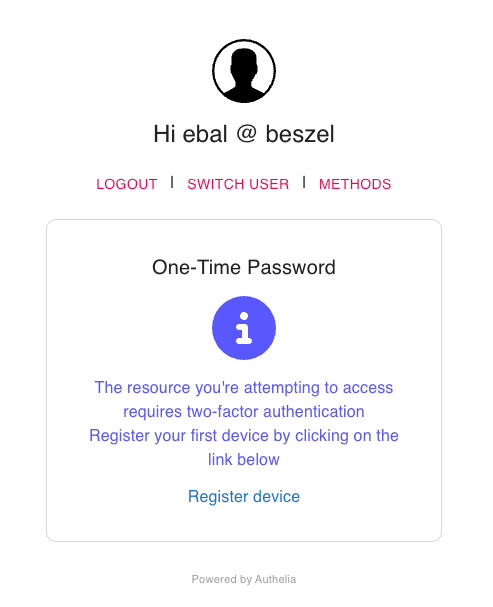
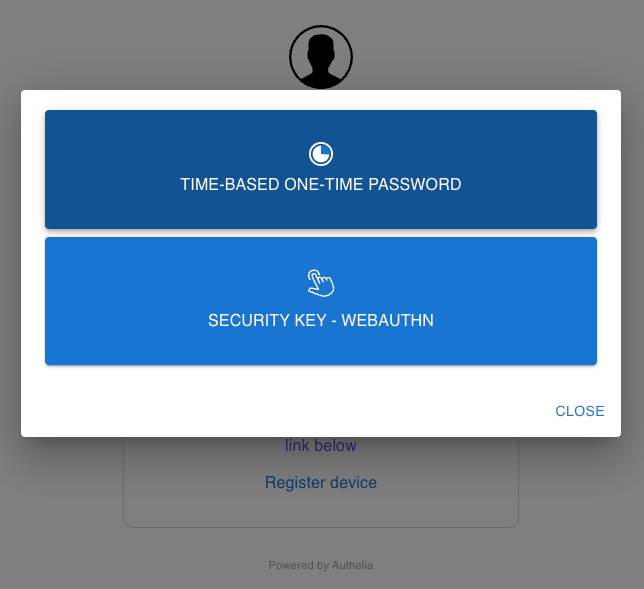
Open https://authelia.example.org in your browser. You should see Authelia’s login page.
Then open https://beszel.example.org on a new tab.
- From home (on your local network, or from your fixed home IP): you should land straight on Beszel — no authelia login, thanks to the
bypassrule for trusted networks. - From anywhere else (try your phone on mobile data or brave via tor): you’ll be redirected to the authelia login page. Log in with the
beszeluser or email and the password you set in ldap, and you should autologin on Beszel, now authenticated. Magic ! - The public blog (
blog.example.org) stays open to everyone — check it still loads without a login.
That’s it !
Evaggelos