




Disclaimer, this blog post is a proof of concept and not a security proposal. Change the HOST PATH to a specific directory.
Prologue
Coding Agents are a useful tool. They can access remote servers using ssh and then run all investigation commands on the destination. They can gather information, read and review all files and also make changes. It can read your secrets and audit your system. For me it’s a tool, how to use it it’s up to you. I have rebuild my homeassistant into an old laptop which has no other secrets than accessing local devices and I can create my automations from my agent. It’s useful.
I also want to use agents or subagents to audit remote systems, do investigations and produce reports for me to read. But I do not want agents to modify the remote system in any way. It should read files, look around, and help me understand what is running there — without giving it a real login and, more importantly, without letting it change anything. No write access, no root access to the actual VPS, and ideally no chance of an “oops, deleted a config” or drop a database.
Idea and architecture
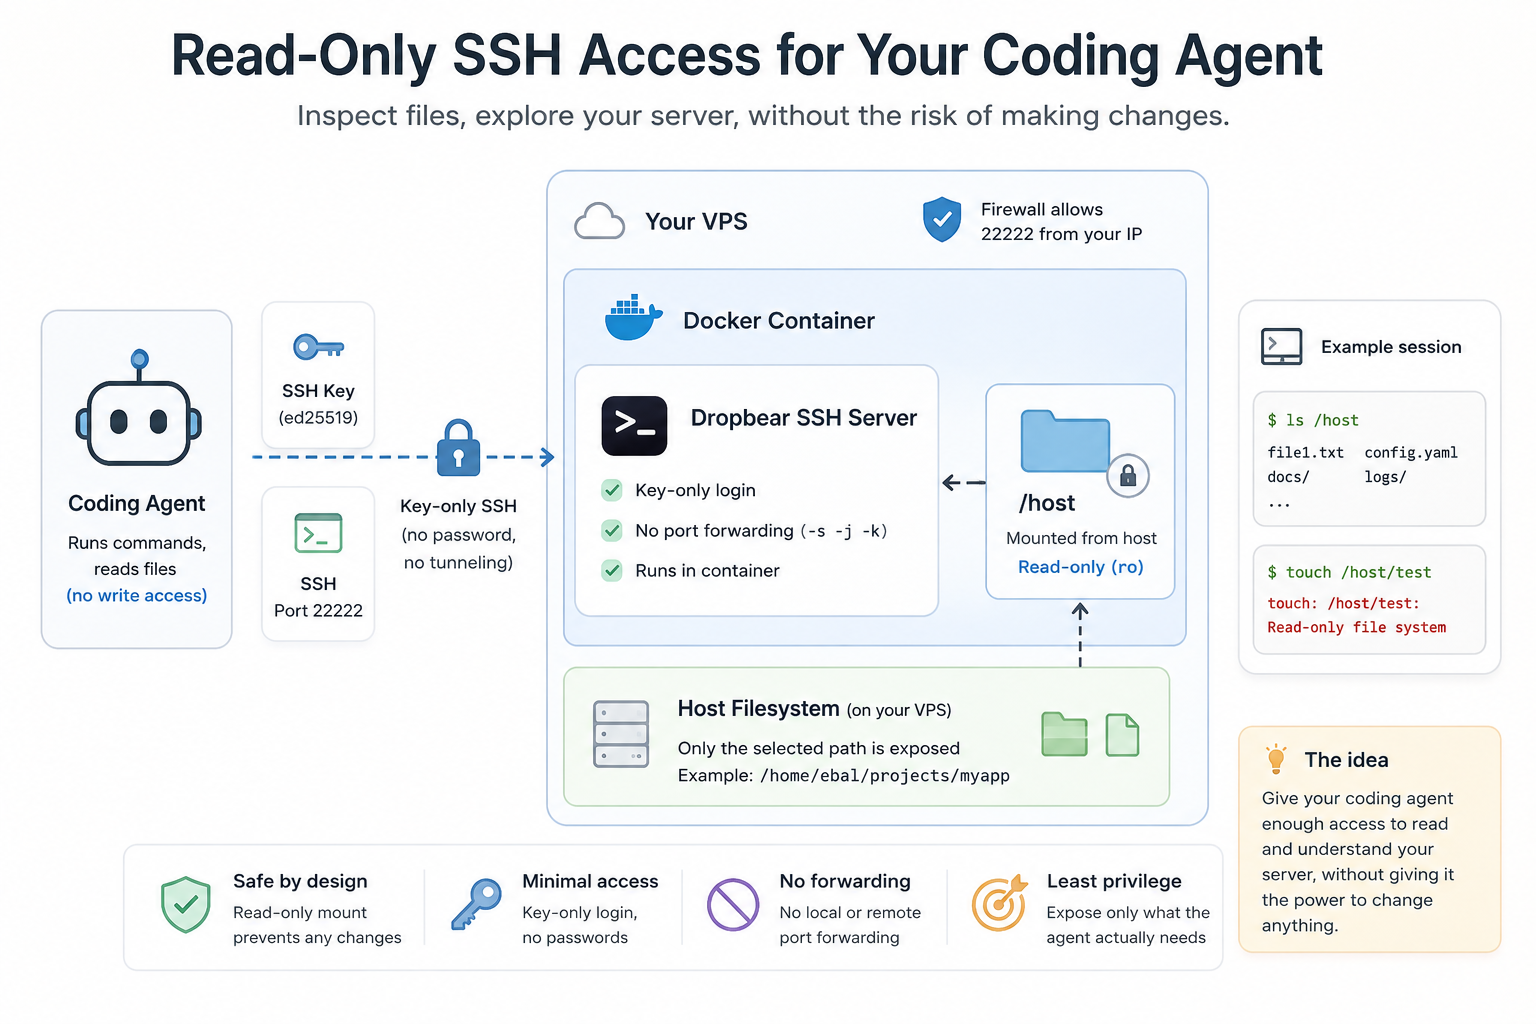
What I ended up with is pretty small and perhaps boring, which is exactly what I wanted: a tiny dropbear SSH server running in a docker container, with the part of the filesystem I want to expose mounted read-only.
This is how to reproduce it.
Dropbear is an SSH server and client. It is designed as a small-footprint alternative to OpenSSH, mostly for embedded systems, but it also works nicely for a throwaway, single-purpose SSH endpoint like this.
Step 1: make an SSH key just for this
Do not reuse your main SSH key for this. Generate a separate one, dedicated for the agent:
ssh-keygen -t ed25519
  -f ~/.ssh/dropbear_readonly
  -C "dropbear_readonly"
  -N ""
This gives you two files:
dropbear_readonly— keep this private. This is what the AI agent (or you) will use to log in.dropbear_readonly.pub— this one is fine to share. It actually goes on the server.
❯ ll
drwxr-xr-x   - ebal ebal 18 Aug 12:40 ..
drwxr-xr-x   - ebal ebal 18 Aug 12:41 .
.rw------- 411 ebal ebal 18 Aug 12:41 dropbear_readonly
.rw-r--r-- 103 ebal ebal 18 Aug 12:41 dropbear_readonly.pub
Step 2: the docker-compose.yml
ssh into the remote vps and inside a new service folder, create a file called docker-compose.yml:
---
services:
  ssh:
    image: alpine:latest
    restart: unless-stopped

    ports:
      - "${SSH_PORT:-22222}:22"

    volumes:
      - ${HOST_PATH:-/opt}:/host:ro
      - ./authorized_keys:/root/.ssh/authorized_keys:ro
      - dropbear-keys:/etc/dropbear

    command: >
      sh -c "
        apk add --no-cache dropbear bash &&
        mkdir -p /root/.ssh &&
        chmod 700 /root/.ssh &&
        exec dropbear -F -E -R -s -j -k -p 22
      "

    healthcheck:
      test: ["CMD", "pidof", "dropbear"]
      interval: 30s
      timeout: 3s
      retries: 3
      start_period: 10s

volumes:
  dropbear-keys:
The 2 parts you need to care about the most from a security point of view are these:
-
${HOST_PATH:-/opt}:/host:ro— this is the folder from the VPS that gets exposed inside the container. The important thing isro: the mount is read-only. -
Dropbear flags:
-s disables password authentication.
-j disables local forwarding, including Unix stream forwarding.
-k disables remote forwarding.
The container itself runs as root internally, but /host is still mounted read-only.
This is not a security advice.
Below you will also see an example with
/and important files like/host/var/run/docker.sockwill be exposed!
additional container hardening
read_only: true

security_opt:
  - no-new-privileges:true
Step 3: tell it which folder to share, and which port to use
I would not leave HOST_PATH at /opt unless that’s actually what you want to expose.
Again, it is better to point it at the specific project or directory the agent needs to inspect, rather than something broad like your whole home directory.
Create a .env file next to the compose file:
❯ cat > .env <<'EOF'
SSH_PORT=22222
HOST_PATH=/home/ebal/projects/myapp
EOF
or change the default values directly in the docker compose yaml file.
Step 4: add the public ssh key
Copy the .pub file you generated into an authorized_keys file in the same folder:
❯ mv dropbear_readonly.pub authorized_keys
 renamed 'dropbear_readonly.pub' -> 'authorized_keys'
Step 5: start dropbear
❯ docker compose upexample output:
❯ docker compose up

[+] up 2/2
 ✔ Network dropbear-ssh_default Created                                                                                                                                    0.4s
 ✔ Container dropbear-ssh-ssh-1 Created                                                                                                                                    0.3s
Attaching to ssh-1
ssh-1  | (1/7) Installing ncurses-terminfo-base (6.6_p20260516-r0)
ssh-1  | (2/7) Installing libncursesw (6.6_p20260516-r0)
ssh-1  | (3/7) Installing readline (8.3.3-r1)
ssh-1  | (4/7) Installing bash (5.3.9-r1)
ssh-1  |   Executing bash-5.3.9-r1.post-install
ssh-1  | (5/7) Installing skalibs-libs (2.15.0.0-r0)
ssh-1  | (6/7) Installing utmps-libs (0.1.3.3-r0)
ssh-1  | (7/7) Installing dropbear (2026.91-r0)
ssh-1  | Executing busybox-1.37.0-r31.trigger
ssh-1  | OK: 10.7 MiB in 23 packages
ssh-1  | [1] Aug 18 09:51:22 Not backgrounding
ssh-1  | [20] Aug 18 09:51:32 Child connection from 192.168.1.72:56149
ssh-1  | [20] Aug 18 09:51:34 Pubkey auth succeeded for 'root' with ssh-ed25519 key

w Enable Watch   d Detach
Then check that it actually came up:
❯ docker compose ps

NAME                  STATUS
dropbear-readonly-ssh-1  Up 12 seconds (healthy)
Step 6: test the login from your laptop
Back on your own machine:
❯ ssh -i ~/.ssh/dropbear_readonly -p 22222 root@your-vps-ipYou should land in a shell. /host is the project folder from your VPS, mounted read-only.
Is it real a readonly filesystem ?
Let’s test it, shall we ?
2420d93953fd:~# tail /host/etc/passwd

fwupd:x:969:969:Firmware update daemon:/var/lib/fwupd:/usr/bin/nologin
passim:x:968:968:Local Caching Server:/usr/share/empty:/usr/bin/nologin
alpm:x:967:967:Arch Linux Package Management:/:/usr/bin/nologin
beszel:x:1003:1005::/home/beszel:/bin/false
cups:x:209:209:cups helper user:/:/usr/bin/nologin
ntp:x:87:87:Network Time Protocol:/var/lib/ntp:/bin/false
minio:x:103:103:Minio Daemon User:/var/lib/minio:/usr/bin/nologin
pcscd:x:963:963:PC/SC Smart Card Daemon:/:/usr/bin/nologin
privoxy:x:42:42:Privoxy:/:/usr/bin/nologin
systemd-imds:x:948:948:systemd Instance Metadata:/:/usr/bin/nologin

2420d93953fd:~# rm -f /host/etc/passwd
rm: can't remove '/host/etc/passwd': Read-only file system

2420d93953fd:~# touch /host/root/file1
touch: /host/root/file1: Read-only file system
That Read-only file system error is basically the whole point.
That’s what you want to see.
Step 7: point the coding agent at it
Now give the coding agent the same three things you just used yourself:
- the host
- the port (
22222) - the private key (
dropbear_readonly)
Depending on the agent, that might be an SSH config entry, or just those values entered into some kind of remote filesystem / SSH setup.
Once connected, it can read and list files under /host, but it can’t modify, delete, or create anything there. If it tries, it’ll get the same Read-only file system error you saw above.
Or even better, update your .ssh/config
Host readonly
    Hostname <your-vps-ip>
    Port 22222
    User root
    IdentityFile ~/.ssh/dropbear_readonly
That’s it.
-Evaggelos
PS. An alternative method
There is always a similar and different solution, to run a coding agent directly to the destination (remote) server and keep the agent only to a specific directory. With this alternative solution we need an agent to each remote server.
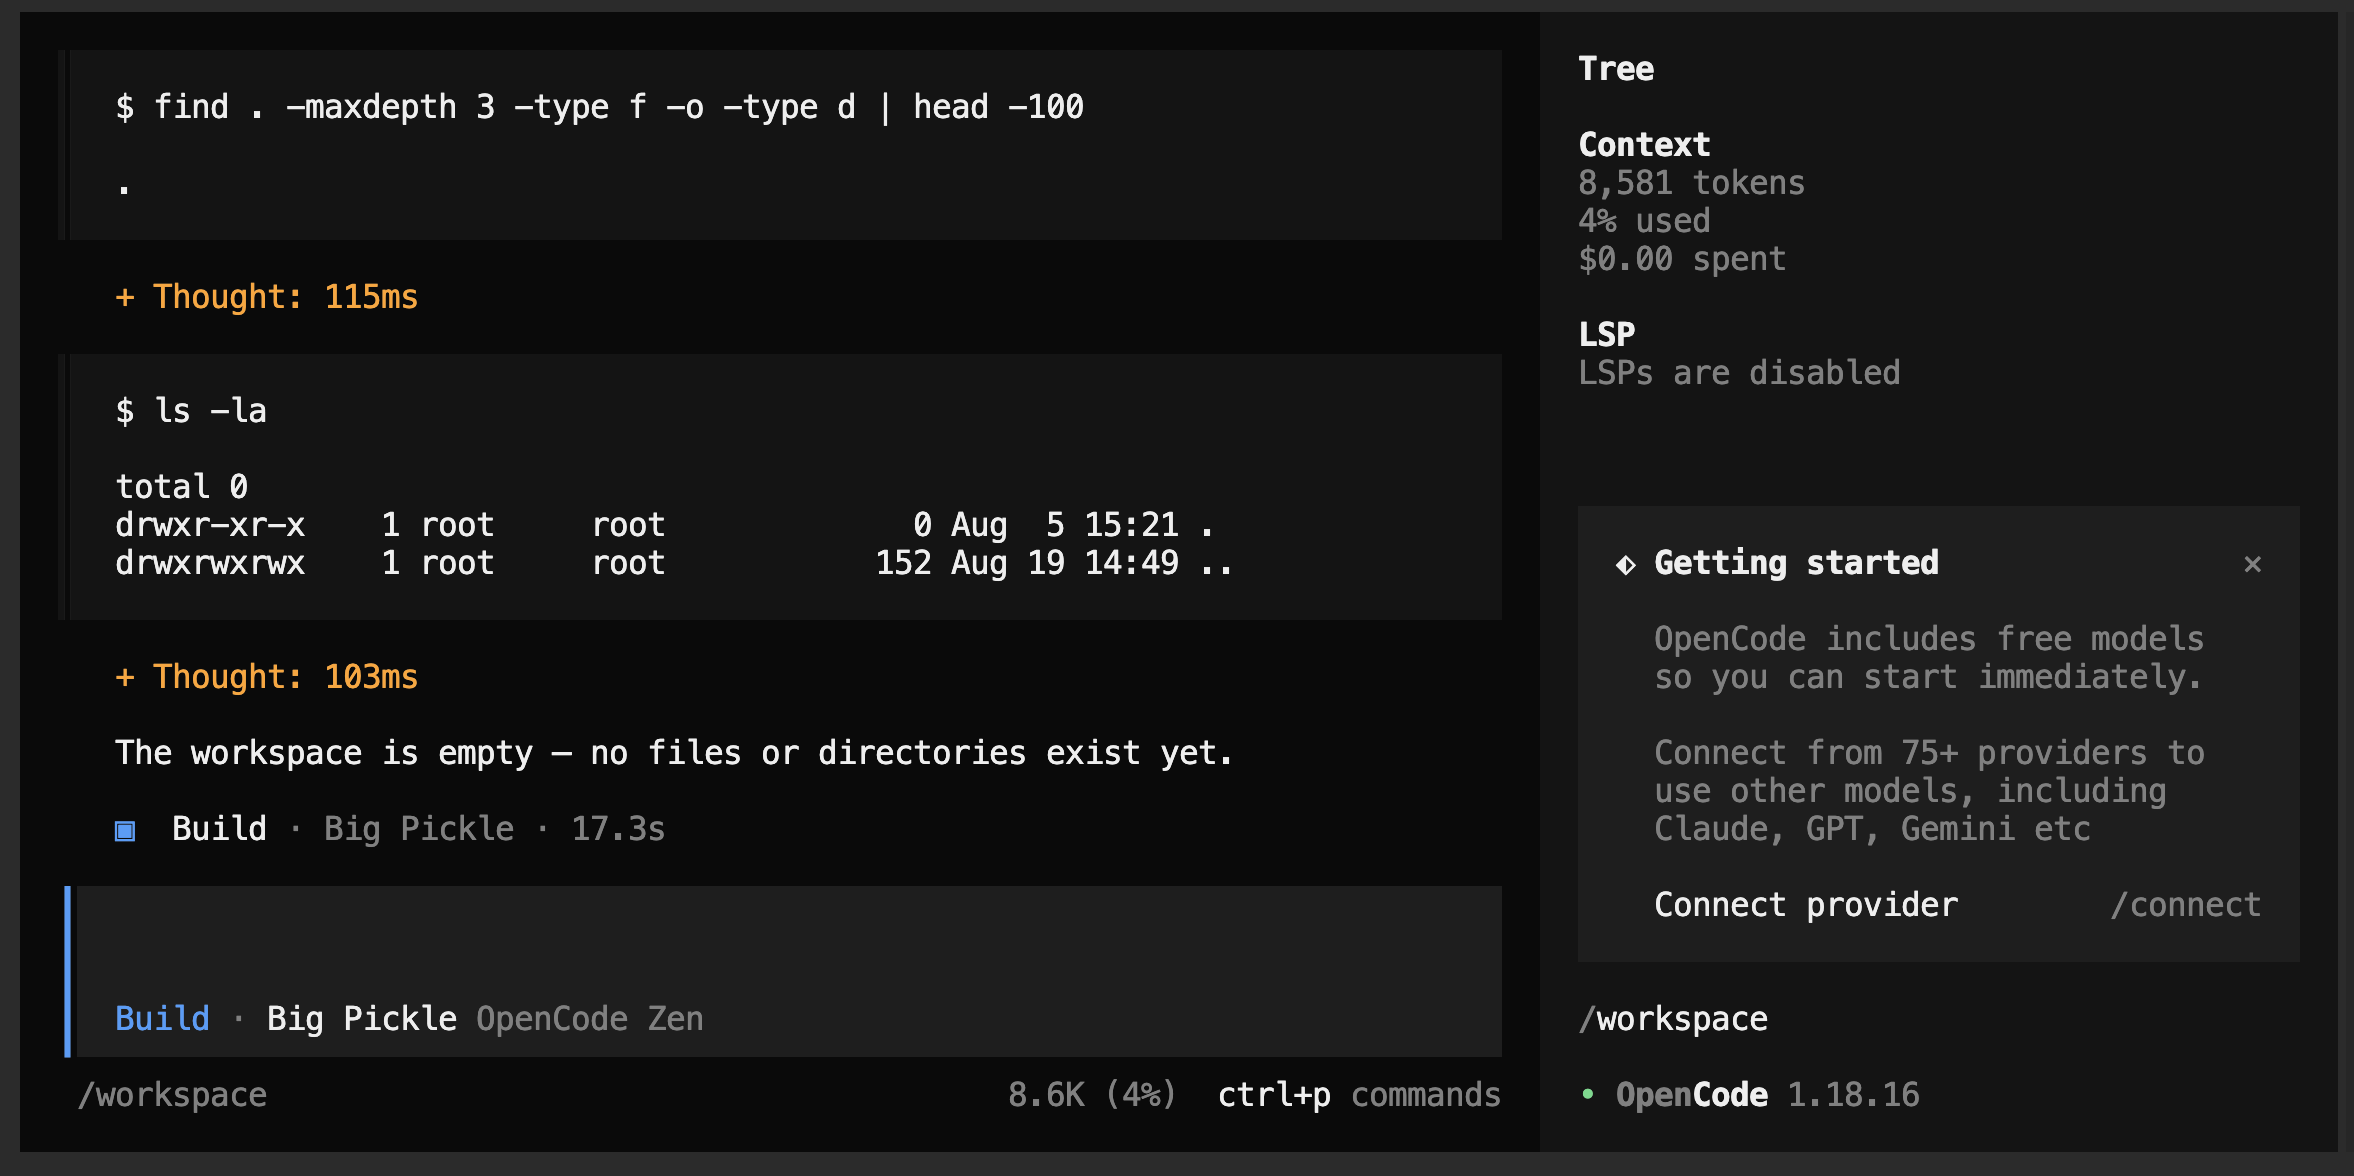
opencode in remote server example
so here is an example:
---
services:
  opencode-sandbox:
    # Pinned version - avoid ':latest',
    # recent builds have had regressions (e.g. TUI hangs)
    image: ghcr.io/anomalyco/opencode:1.18.16
    container_name: opencode_agent
    # Keep stdin open for the interactive TUI
    stdin_open: true
    # Allocate a TTY for interactive use
    tty: true
    # Mount local folder into the sandbox
    volumes:
      - ./sandbox:/workspace
    # Set /workspace as the default working directory
    working_dir: /workspace
    # Keep secrets (API keys) out of this file
    env_file:
      - opencode.env
    environment:
      - TZ=Europe/Athens
    # Prevent privilege escalation inside the container
    security_opt:
      - no-new-privileges:true
    # Cap memory - adjust to taste
    mem_limit: 2g
    # Cap CPU
    cpus: 2
    restart: unless-stopped
and the env example file: opencode.env
# ANTHROPIC_API_KEY=your_key_here
# OPENAI_API_KEY=your_key_here
❯ docker compose exec -ti opencode-sandbox opencodean example